
Section 1 - Setting up the Default profile
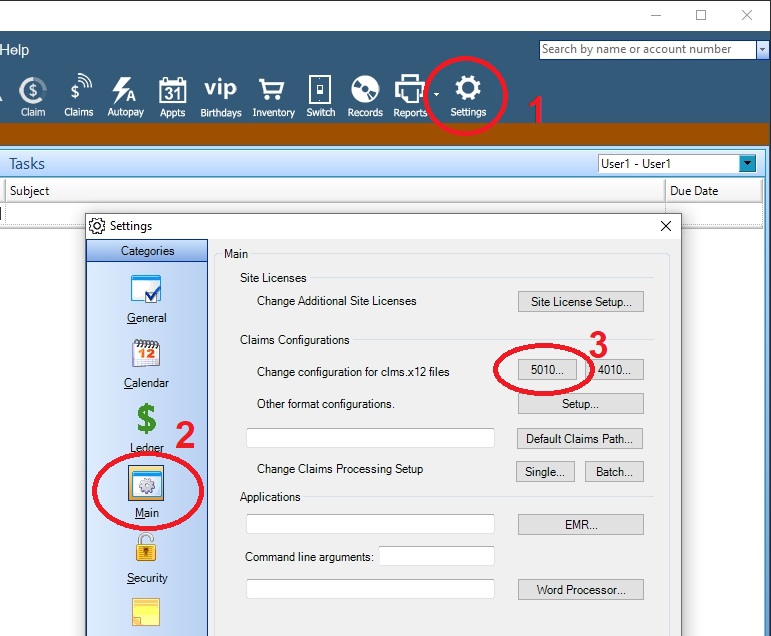
To create or edit a billing profile you go to “Settings.”
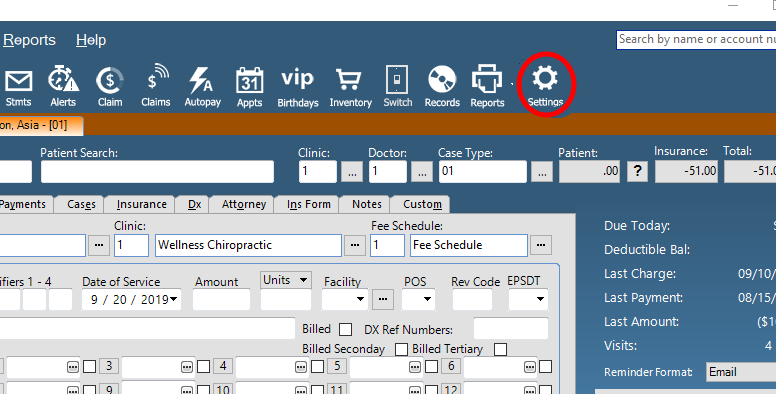
Select "Main" Then "5010"
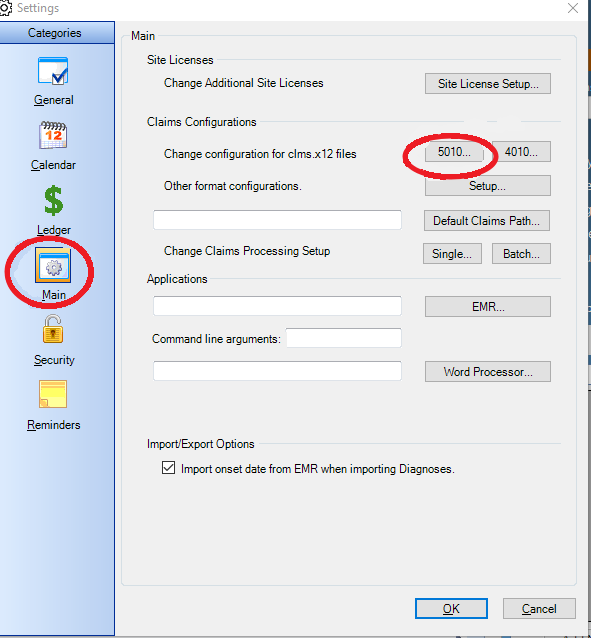
- Under the “General” tab, this information needs to be completed. You can find this information in the welcome packet from your clearinghouse if you use a clearing a house and/or the Companion Guide.
- Be sure to check Omit Currency Segment
- If they need to submit a test batch, check Run in Test Mode. When accepted, uncheck that to put in Production Mode
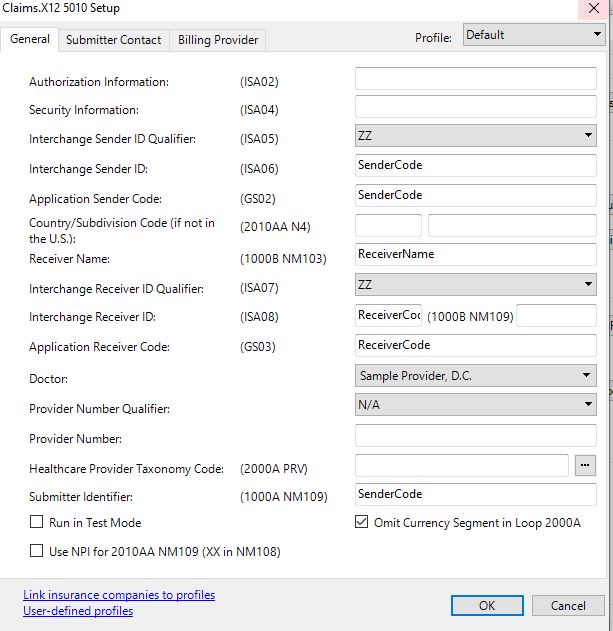
The next tab is the “Submitter Contact" Whoever will be sending claims is the person who should be listed on this tab. You can select to include a telephone number or an email or fax etc.
If the office receives payment at a P.O. Box, rather than the physical address, complete the 2010AB section
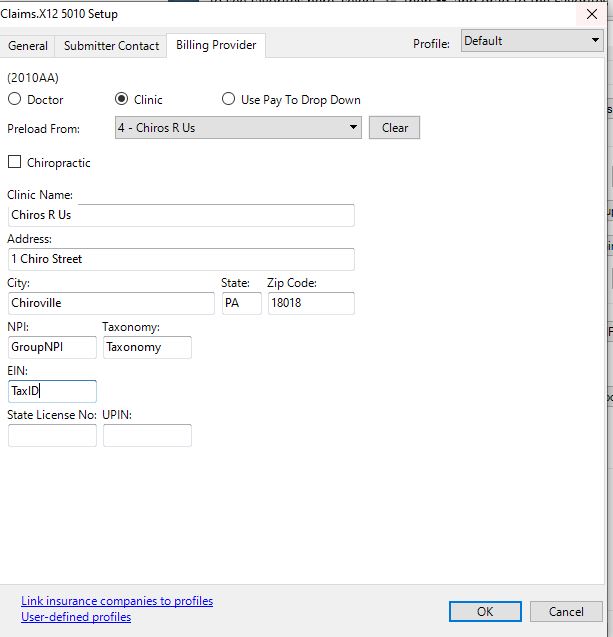
The final tab is the "Billing Provider" tab.
If you enrolled as a clinic you need to fill in that information or you can select to preload it from the drop down list, which should have your clinic information. Be sure to enter the Group NPI and Tax ID in EIN field and Taxonomy code, as needed.
If you enrolled as the doctor, you can preload the information from the Doctor in the drop down list. This should have the individual, NPI and Tax ID and select EIN from the drop down list.
Section 2 - Creating additional billing profiles
Go to Settings, choose Main on the left side menu and click on the 5010 button.
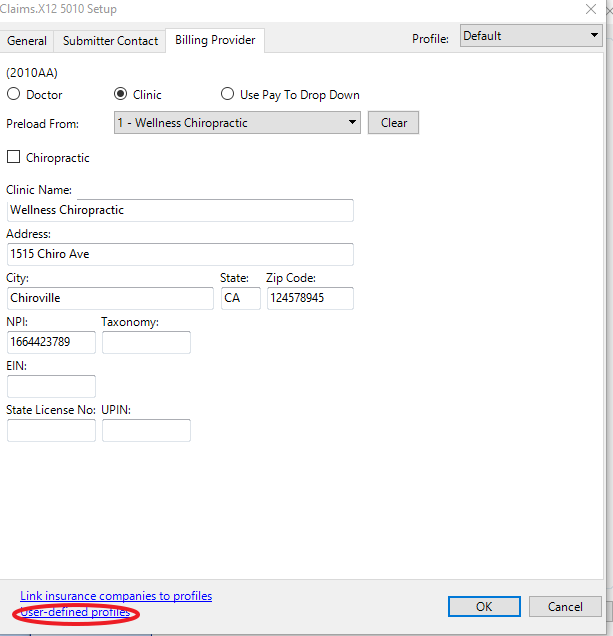
Select “User Defined Profiles" in the bottom left of the window
Select " Add"

Once you have given the billing profile a code and description, select "Save.”
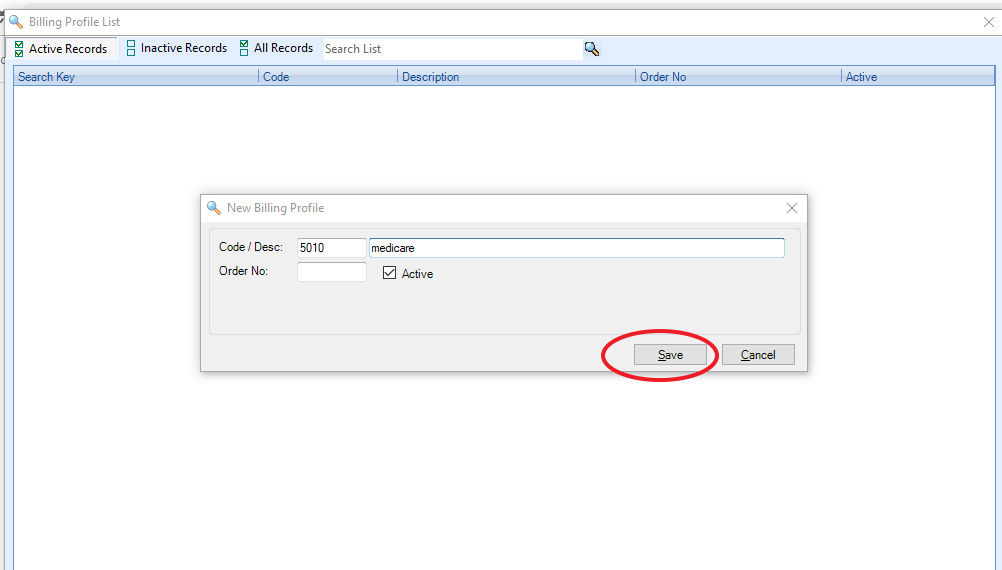
After saving the billing profile, you should be able to see the billing profile from drop down list. 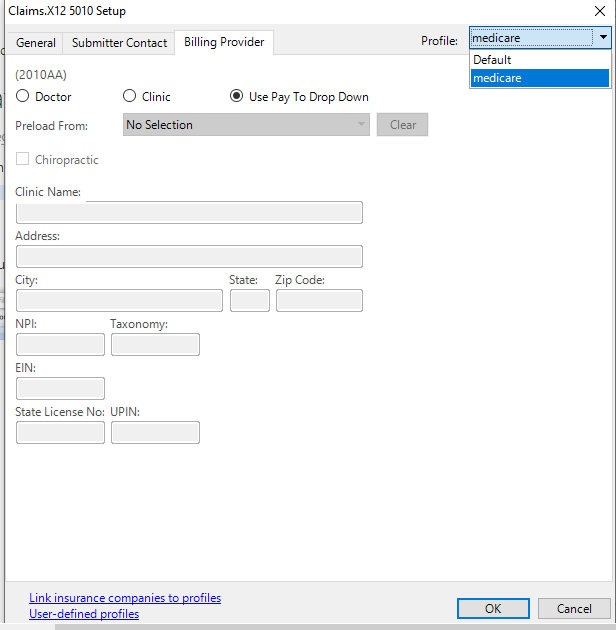
If you need to link specific insurance carriers to a billing profile. You select “Link insurance companies to profiles".
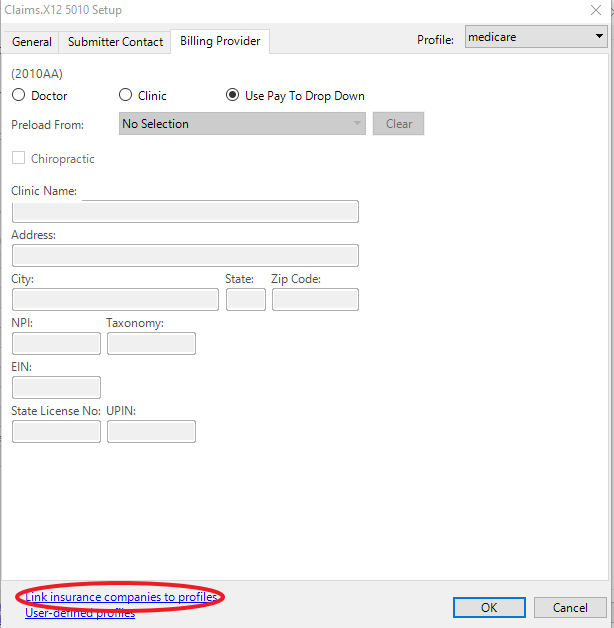
At the bottom of the page, you need to select "Link selected companies to:” Here is where you would select which billing profile. Then highlight the insurance carrier and click the Link button. Click Save when finished.

revised NSM 11/18/2019
0 Comments